Taking photos is the bottleneck that kills most reselling businesses. Not sourcing. Not shipping. Photos.
I've watched sellers spend 5 to 10 minutes per item, carefully arranging, shooting, rearranging, and reshooting. At that pace, photographing 50 items takes the better part of a day. And when you're sitting on a death pile of unsourced inventory, that kind of time investment feels paralyzing.
But here's the thing: the sellers doing 200+ listings a week aren't spending more time on photos. They're spending less. They've built a system that separates the creative decisions from the repetitive actions, and they batch everything.
Here's exactly how to set up a photo workflow that gets you through 50 items in about an hour, without sacrificing the quality that actually drives sales.
Your Photo Station Is Everything
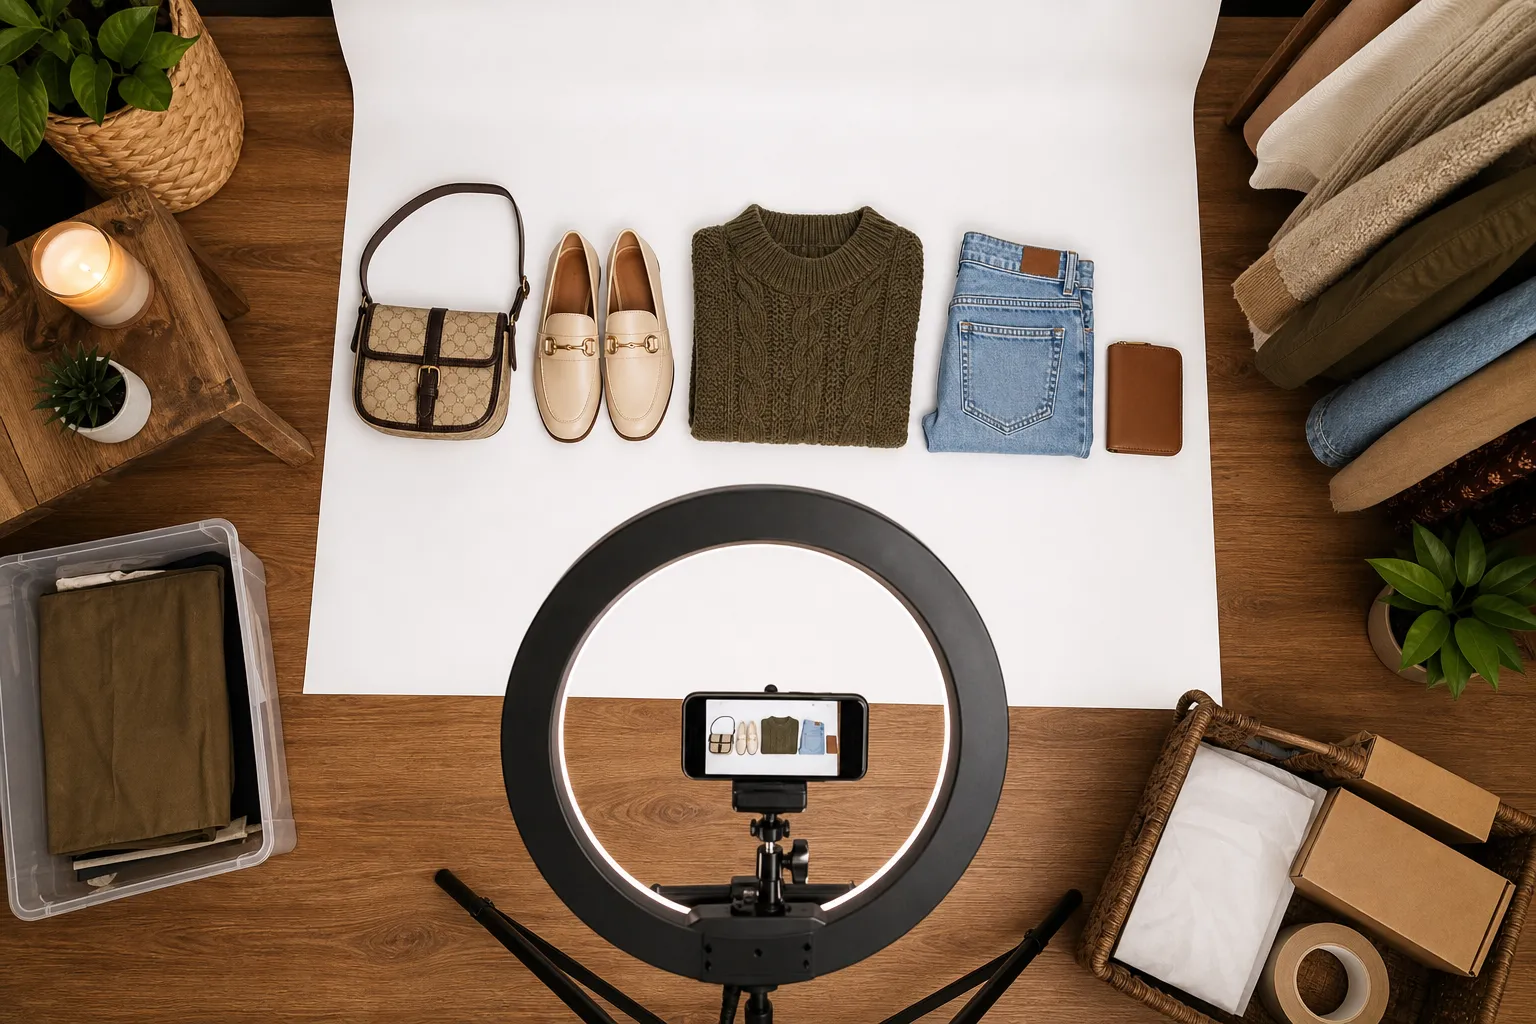
The single biggest time savings comes from having a permanent photo station. Not a setup you assemble and tear down. A dedicated spot that's always ready.
You don't need expensive equipment. Here's what actually works:
The bare minimum setup (under $20):
- A roll of white drawing paper from a craft store ($5) taped to the wall behind a table, curving down to create a seamless backdrop
- A window with indirect natural light (north-facing is ideal)
- Your phone
The upgraded setup (under $75):
- A collapsible lightbox ($25 to $40 on Amazon) for small to medium items
- A ring light or two LED panel lights ($15 to $30)
- A cheap phone tripod ($10)
- White and gray backdrop options
The key is that your station stays set up. When you walk over to it, you should be able to start shooting in under 30 seconds. If you're pulling out a lightbox from a closet and unfolding it every time, you've already lost.
One Reddit seller shared a setup they built for about $5 total: a cardboard box, leftover wallpaper for the backdrop, and a ring light from Goodwill. They were processing 10 cards per minute. That's the mindset. Function over aesthetics.
The Batch Photography Method
This is where the real speed comes from. Instead of photographing one item completely, then moving to the next, you batch by shot type.
Step 1: Sort your items into groups (5 minutes)
Before you touch your camera, sort your 50 items into categories that need similar photo setups:
- Flat items (clothing, books, cards, fabric)
- Standing items (electronics, shoes, toys, bottles)
- Small items that need the lightbox (jewelry, watches, small parts)
This matters because each group uses a slightly different camera position and lighting angle. You set it once per group instead of adjusting for every single item.
Step 2: Shoot front/overview photos for an entire group (15 to 20 minutes)
Line up your first group. Shoot the front or overview photo for every item before moving to the next angle. You're essentially doing one motion repeatedly: place item, tap shutter, remove item, repeat.
Top eBay sellers recommend making your first photo show the complete item. That's the thumbnail buyers see in search results, and eBay's own guidelines say the item should fill 80 to 90% of the frame. Get this one right and the rest are supporting details.
Step 3: Rotate through detail shots (20 to 25 minutes)
Now go back through and shoot the detail angles:
- Back or underside
- Labels, tags, or brand markings
- Condition issues (scratches, stains, wear)
- Size indicators (ruler or coin for scale when needed)
For clothing, you'll want to capture the tag, any pattern detail, and fabric texture. For electronics, get the model number, ports, and any cosmetic damage.
Step 4: Flaw documentation (5 to 10 minutes)
This is the step most sellers skip and then pay for in returns. Go back through your items and shoot every single flaw. Be honest and direct. A clear photo of a scratch builds more trust than trying to hide it, and it protects you from "item not as described" cases.
Camera Settings That Save Time
Use your phone. Seriously. Unless you're selling high-end watches or fine art, your phone camera is more than sufficient. But dial in these settings once:
Set your aspect ratio to 1:1 (square). eBay displays photos in a square format. If you're shooting in 16:9, you're wasting frame space and you'll need to crop later. Shoot square from the start and compose your shot to fill the frame.
Turn off the flash. Always. Phone flash creates harsh shadows and washes out colors. Your lightbox or window light handles illumination.
Lock your exposure. On most phones, you can tap and hold on the screen to lock focus and exposure. Do this once when you set up your station, and it stays consistent across items.
Use burst mode for tricky items. Items that are reflective or hard to focus on benefit from burst mode. Take 5 shots, pick the best one later.
The "Assembly Line" for Post-Processing
After your photo session, you need to get 50 items' worth of photos organized and ready for listing. Here's the system:
Naming convention: As you photograph each item, keep them in order. When you transfer photos to your computer or listing tool, they'll naturally group by item. Some sellers use a small numbered card they place next to each item's first photo as a visual separator.
Minimal editing: Resist the urge to heavily edit. Crop to center the item if needed, and adjust brightness if the lighting was inconsistent. That's it. Heavy filtering looks unprofessional and makes buyers suspicious about the actual condition.
Cloud sync: If you're listing from a computer, use Google Photos, iCloud, or Dropbox auto-sync so your photos appear on your desktop within seconds of shooting them on your phone.
How Many Photos Per Listing?
eBay allows up to 24 photos per listing, but more isn't always better if it slows you down. Here's a practical guide:
| Item Type | Recommended Photos | What to Capture |
|---|---|---|
| Clothing | 4 to 6 | Front, back, tag, fabric detail, any flaws |
| Electronics | 6 to 10 | All sides, ports, screen, model number, power on |
| Books/Media | 3 to 4 | Cover, spine, back, any damage |
| Shoes | 5 to 7 | Both shoes, soles, inside, brand marking, wear |
| Small collectibles | 4 to 6 | Multiple angles, markings, scale reference |
| Jewelry | 5 to 8 | Multiple angles, clasp, markings, worn shot |
The goal is enough photos that a buyer can make a confident purchasing decision without messaging you with questions. Every message exchange adds days to your sale cycle.
Common Mistakes That Slow You Down
Perfectionism on low-value items. If you're selling a $8 used book, spending 5 minutes arranging the perfect shot doesn't make economic sense. Match your effort to the item's value.
Retaking photos you've already taken. Unless the photo is genuinely blurry or poorly lit, move on. "Good enough" photos that exist beat "perfect" photos you'll take tomorrow.
Not having a dedicated photo area. I keep coming back to this because it's that important. The setup and teardown time adds up across hundreds of items. A permanent station removes that friction entirely.
Shooting in direct sunlight. It seems counterintuitive, but direct sun creates harsh shadows and blown-out highlights. Diffused or indirect light gives you even, professional-looking results with zero effort.
Putting It All Together: The 60-Minute Session
Here's what a real 50-item photo session looks like:
- Minutes 0 to 5: Sort items into 3 or 4 groups by type
- Minutes 5 to 25: Front/overview shots for all 50 items
- Minutes 25 to 45: Detail and angle shots for all items
- Minutes 45 to 55: Flaw documentation pass
- Minutes 55 to 60: Quick review on phone, reshoot any obviously bad ones
That's it. You've just created the photo assets for 50 listings in an hour. With practice, you'll get even faster as the motions become automatic.
The real secret isn't any single technique. It's treating photography as a manufacturing process instead of a creative project. Set up once, batch everything, and move fast. Your listings will look great, your death pile will shrink, and you'll actually have time to do the parts of reselling that make money: sourcing and selling.
How ListForge Takes It From Here
You've got the photos. That used to be the halfway point. Now it's basically the finish line.
ListForge picks up exactly where your camera roll ends. Upload your photos and AI takes over the entire listing process:
- It reads your photos like a reseller would. The moment you upload, ListForge identifies the product from your images, reading brand marks, label text, tags, and visual details. It notices things you might miss when you're moving fast through a batch.
- Automatic condition assessment. ListForge examines your photos for wear, scratches, missing parts, and damage, then selects the right eBay condition category and writes detailed condition notes. It grades conservatively (fewer returns) and documents specific locations of wear, like "light scratches on back plate" instead of vague "good condition."
- Market-anchored pricing. ListForge doesn't guess at prices. It searches across marketplaces, cross-references sold data, and traces every suggested price back to actual market evidence. If it can't find enough evidence to anchor a price, it tells you honestly instead of making up a number.
- Complete listings, not just descriptions. Your listing isn't built by one generic AI prompt. ListForge handles the title (front-loading brand and model for search), a structured description (with condition details, what's included, and key specs), every required item specific (searching eBay's actual field requirements), the right leaf category, and shipping. All from your photos.
- You review before anything goes live. Every listing goes through an approval step where you see exactly what will be published. Edit anything you want, or approve and it's listed.
The whole point of batch photography is speed. ListForge makes sure that speed carries through the entire listing process. You photograph 50 items in an hour, and ListForge turns those photos into complete, market-priced, ready-to-post listings without you typing a single description.
Try ListForge free and see how fast your photo batches become live listings.